Installing a new fuel tank isn’t just a checklist item — it’s a critical safety step that protects drivers and equipment.
Replacing a damaged or aging fuel tank is a necessary maintenance job, but too often, the focus is just on getting the old one off and adding the new one. At AlumiTank, we see installation as one of the most important moments in a fuel tank’s life. A tank built with precision and care deserves to be installed with the same attention to detail.
When installation is rushed or done incorrectly, you don't just risk a leak; you risk fines, safety hazards, and premature equipment failure. Here’s a guide on why correct installation is a safety investment that pays off in longevity and peace of mind.
The Critical Checklist: Securing Every Connection
A new tank is an empty shell until it's connected to your truck's system. Every fitting — from the vent to the lines — is a potential leak point if not secured correctly. A small oversight during installation can lead to big problems down the road.
Our trusted AlumiTank Tank team stresses that after installing your tank, it's essential to ensure all fittings are tight. This includes the fuel cap, vent, and sending unit. Securing every connection prevents leaks while you're on the road, ensuring you stay in compliance and keep moving freely.
Key Installation Steps to Double-Check:
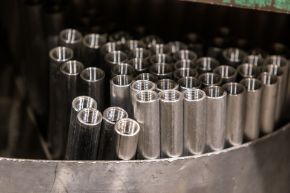
- Tighten Every Fitting: This includes the fuel cap, sending unit, and any port plugs. Use the correct tools and torque specs to ensure a secure, leak-free seal.
- Verify Line Connections: The suction and return lines must be hooked up to the proper ports for the engine to operate correctly. Mistakes here can cause the truck to run poorly or not at all. Always refer to your truck's schematic or the draw tube location guide that comes with your tank.
- Proper Strapping: The tank must be secured tightly to the chassis using the correct straps and hardware. A tank that rattles is a tank that is wearing itself out.
The Danger of a "Rattling" Tank
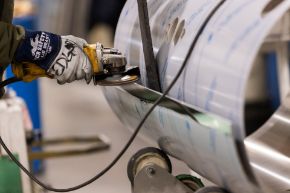
For a tank to last, it needs to be securely mounted. On older tanks, especially those subjected to constant road vibration, we often see cracking close to the backside of the tank near the weld seam. This isn't just cosmetic damage; it's a structural failure caused by a lifetime of small impacts and movement—a problem often accelerated by an improperly secured installation.
The Safety Risk of Wear and Tear:
- Fuel Leaks: A crack, even a hairline fracture, is a leak. This poses an immediate environmental and fire hazard and can lead to expensive fines from the Department of Transportation (DOT).
- Premature Failure: Vibration is metal fatigue's best friend. A poorly secured tank will wear out much faster than a stable one, turning a potential decade-long investment into a short-term headache.
Pro Tip: Check for Trouble Spots
Make it a habit to check the area around the straps and weld seams on older tanks. Signs of a potential leak often include grime and dirt compiling around the strap location. Clean the area and shine a light to look for any hairline fractures. Catching a small issue early can mean a repair rather than a full replacement.
Right Tank, Right Fit: Avoiding Costly Errors
Even the best-built tank can be rendered useless if it's the wrong one for the chassis. Our team understands that ordering the wrong tank can happen, and they are always ready to help you explore your options.
This is why we take the time to ensure clear and concise ordering information. Our team helps you pinpoint the exact tank you need, whether by OEM part number, photos, or a quick measurement worksheet. Choosing the right tank eliminates the frustrating and costly downtime associated with receiving a part that simply won't fit.
At AlumiTank, our commitment to precision doesn’t end with the weld—it extends to making sure you have the information and the right product to complete the installation as a safety investment.
Questions about installation, measuring, or ordering? Our sales team is ready to walk you through the process step-by-step. Give us a call.